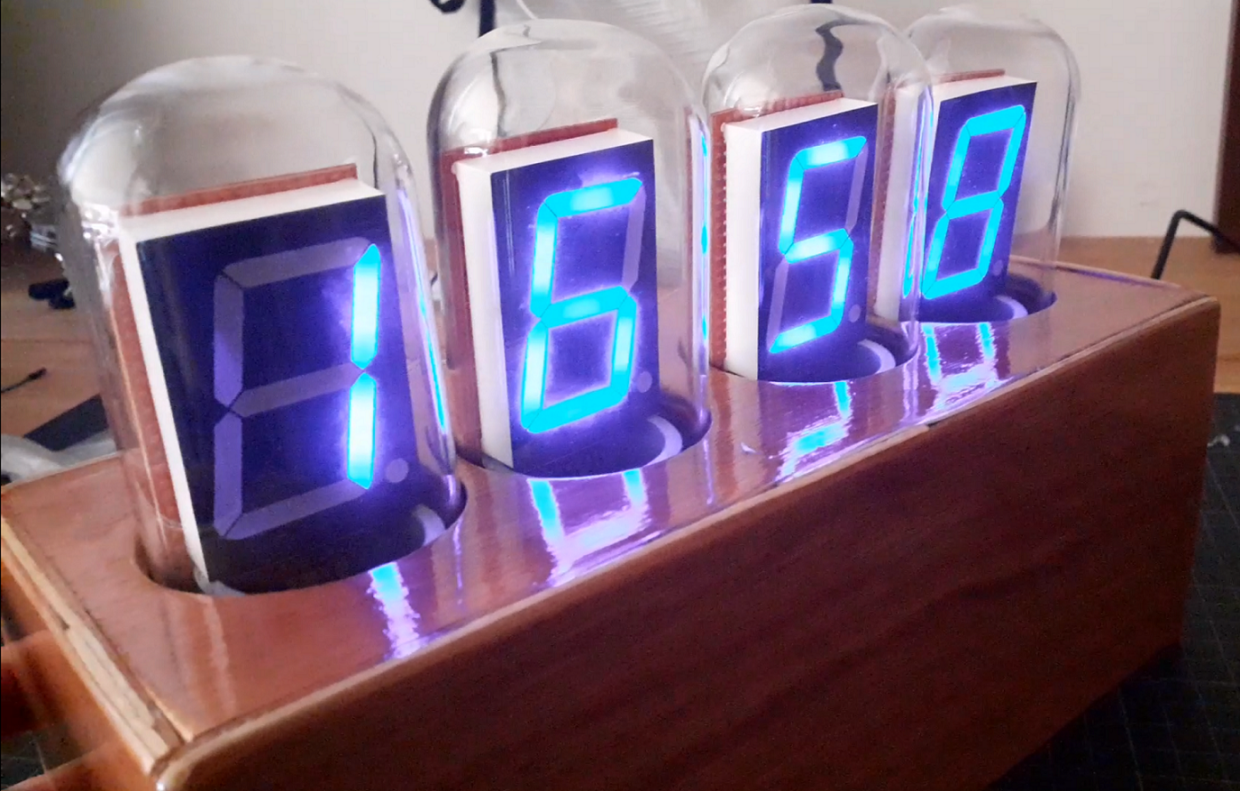
With “Retro” and “Industrial” being the trend when it comes to interior design for quite some time already I loved the looks of the Karlsson Cathode Clock. I first saw this clock in 2017 in a small design shop in Rotterdam here in the Netherlands. Influenced by Nixie tubes its simplicity and design stuck with me for a while and kept floating in-and-out of my mind for a couple of years. In theory the inner workings of such a clock aren’t rocket science and I should be able to design one for myself.
Eventually I took my own design inside the woodworking-workshop, glued some pinewood together and hand soldered the PCB into the first version of my very own LED Cathode Clock which I gifted to my good friend.
Even though my modelling skills suck, I’ve used https://app.sketchup.com/ to create a 3D drawing in order to get a feeling for the dimensions of the clock and what distances (e.g. between the glass domes) are visually the most appealing. I added the drawings to this post, you can find them at the bottom.

I am still in the process of refining the design, certainly when it comes to the Arduino code (which I used as the brain for this clock). But in case you would like to try it out for yourselves, here is what you need:
Materials
Hardware
- 2x front and back, pinewood (262mm * 80mm * 6mm)
- 2x sides, pinewood (90mm * 74mm * 6mm)
- 1x top, pinewood (262mm * 90mm * 6mm)
- 1x bottom, pinewood (250mm * 90mm * 6mm)
- 1x inside beam, to raise the domes (250mm * 50mm * 50mm)
- 4x inside PVC (plumbers) pipe, to raise LEDs above the top (40mm diameter)
- Glass domes (50mm diameter), you can get these at Groene Vingers in Delft
Electronics
- 4x 74HC595 shift registers (see also https://www.arduino.cc/en/Tutorial/Foundations/ShiftOut)
- 4x 7-segment cathode displays (large ones (4,5cm/1.8inch))
- Arduino Uno/Arduino Nano
- 28x resistors 200 ohm (depending on initial brightness of LEDs)
- Real Time Clock (RTC) module
- On/Off switch/button
- Push button (for controls)
- Potentiometer (for minutes/hour-settings)
- 9V/12V adapter
- DC Power Supply Female Jack Socket 5.5 x 2.1mm Barrel-Type
- Lots of wire
Realisation
Casing
For the casing you’ll need to follow these steps:
- Make sure you cut your wooden parts to the right sizes
- Cut the holes in the top part for the glass domes to fit through. It doesn’t matter if the fit is too tight, you can always sand the holes down.
- Make sure you drill and router the holes for the buttons and adapter-input on the back panel (see the previous picture)
- Glue the box together (except for the bottom)
- Glue the beam on the underside
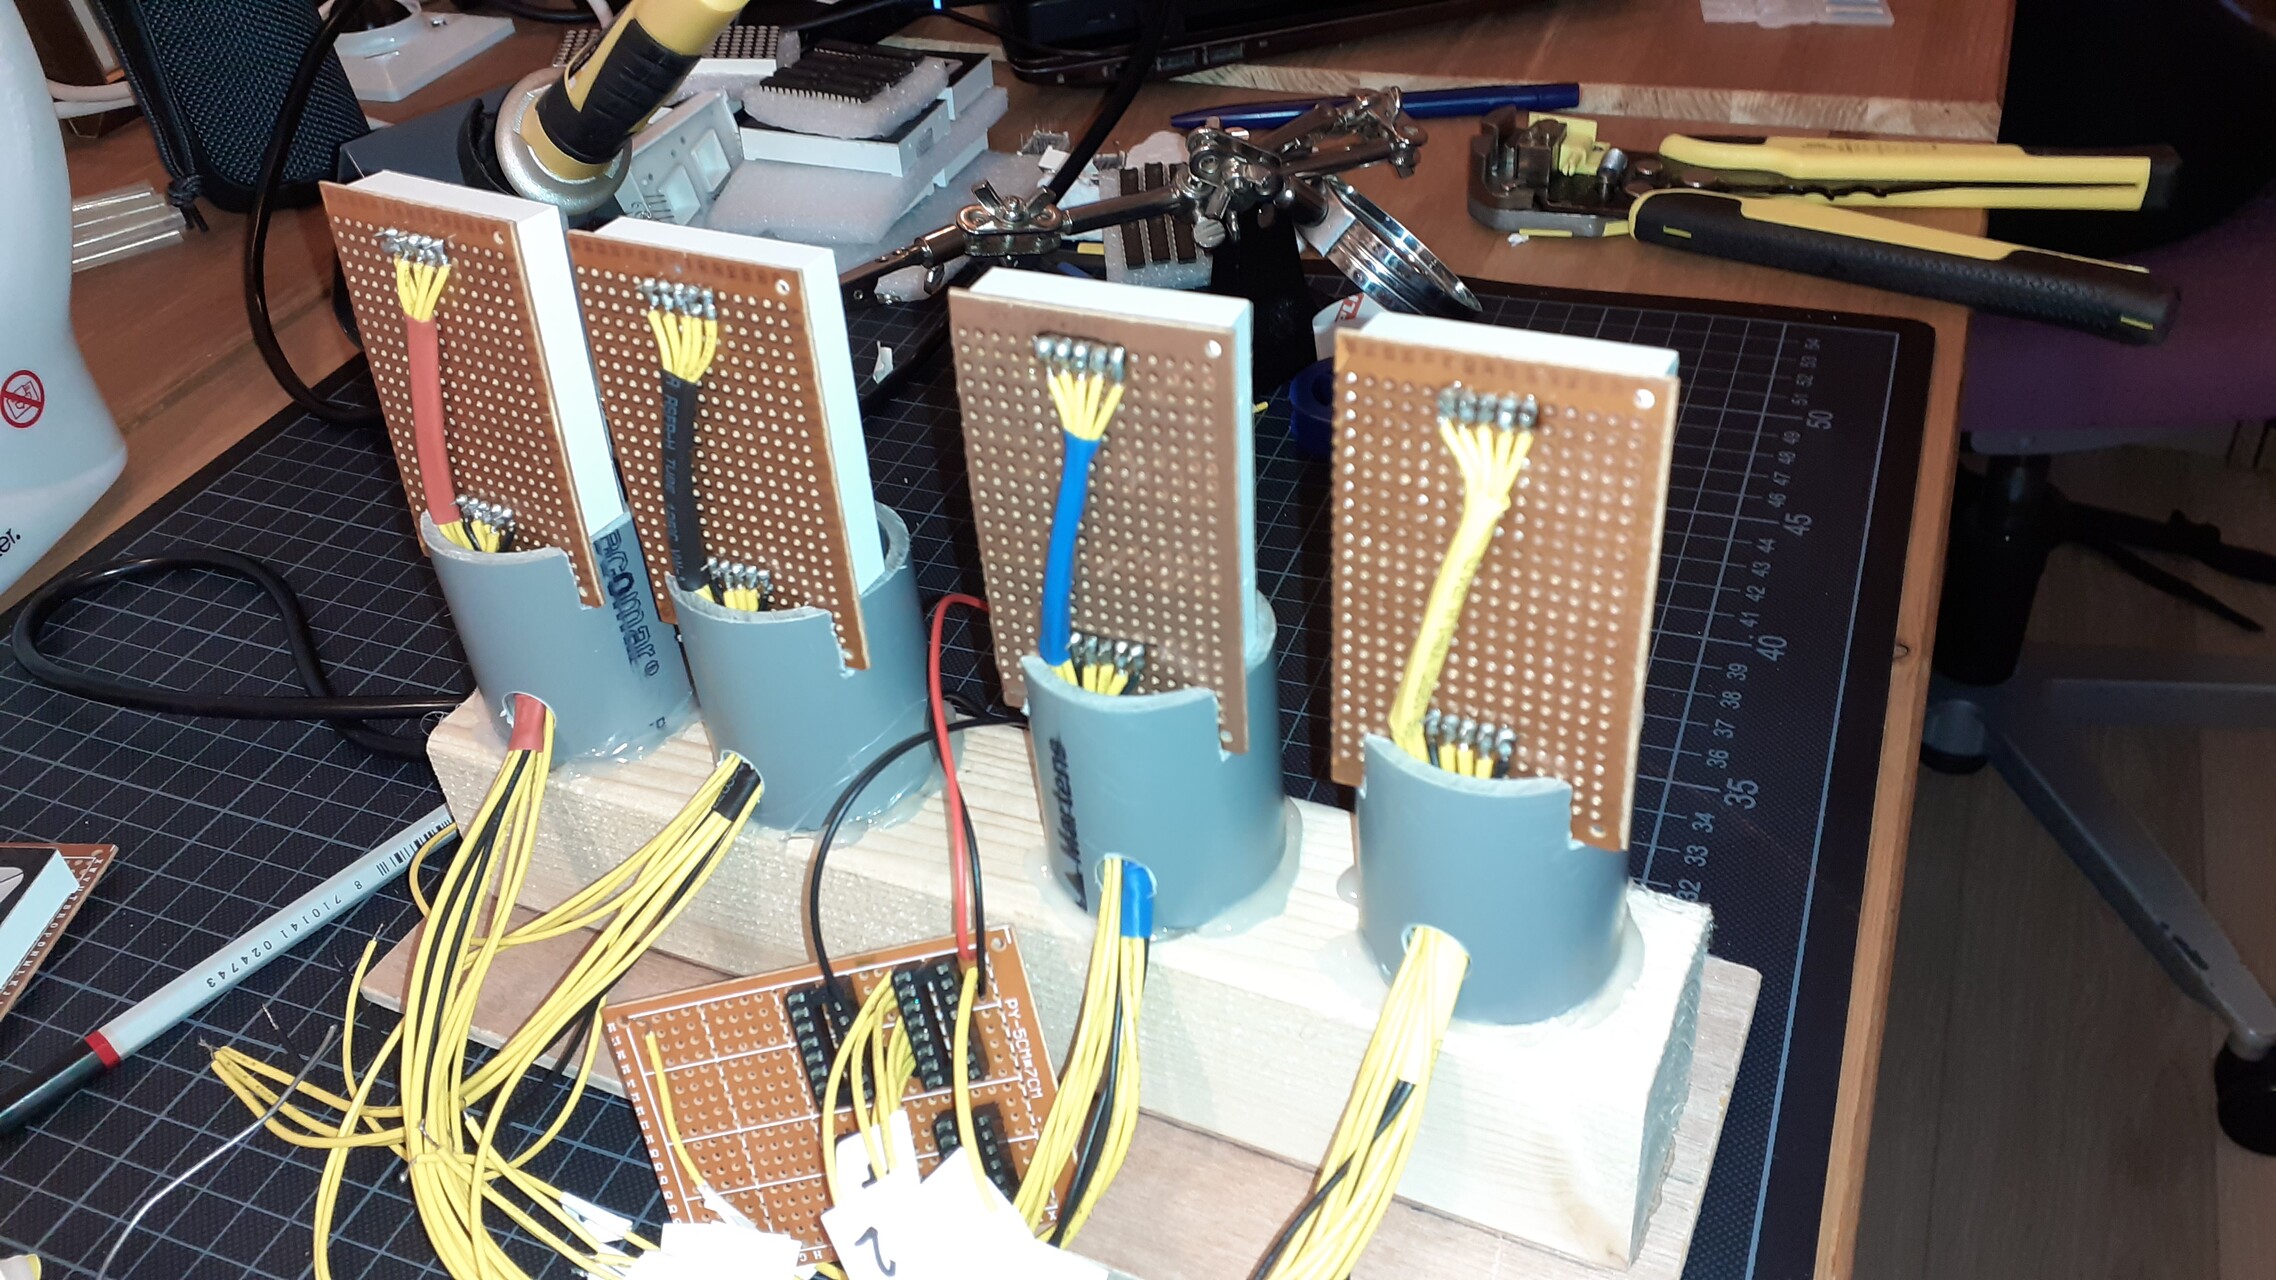
- drill holes in the PVC pipe so you can run the wires through them. Make them just wide enough for a large pack of cables (see the last picture)
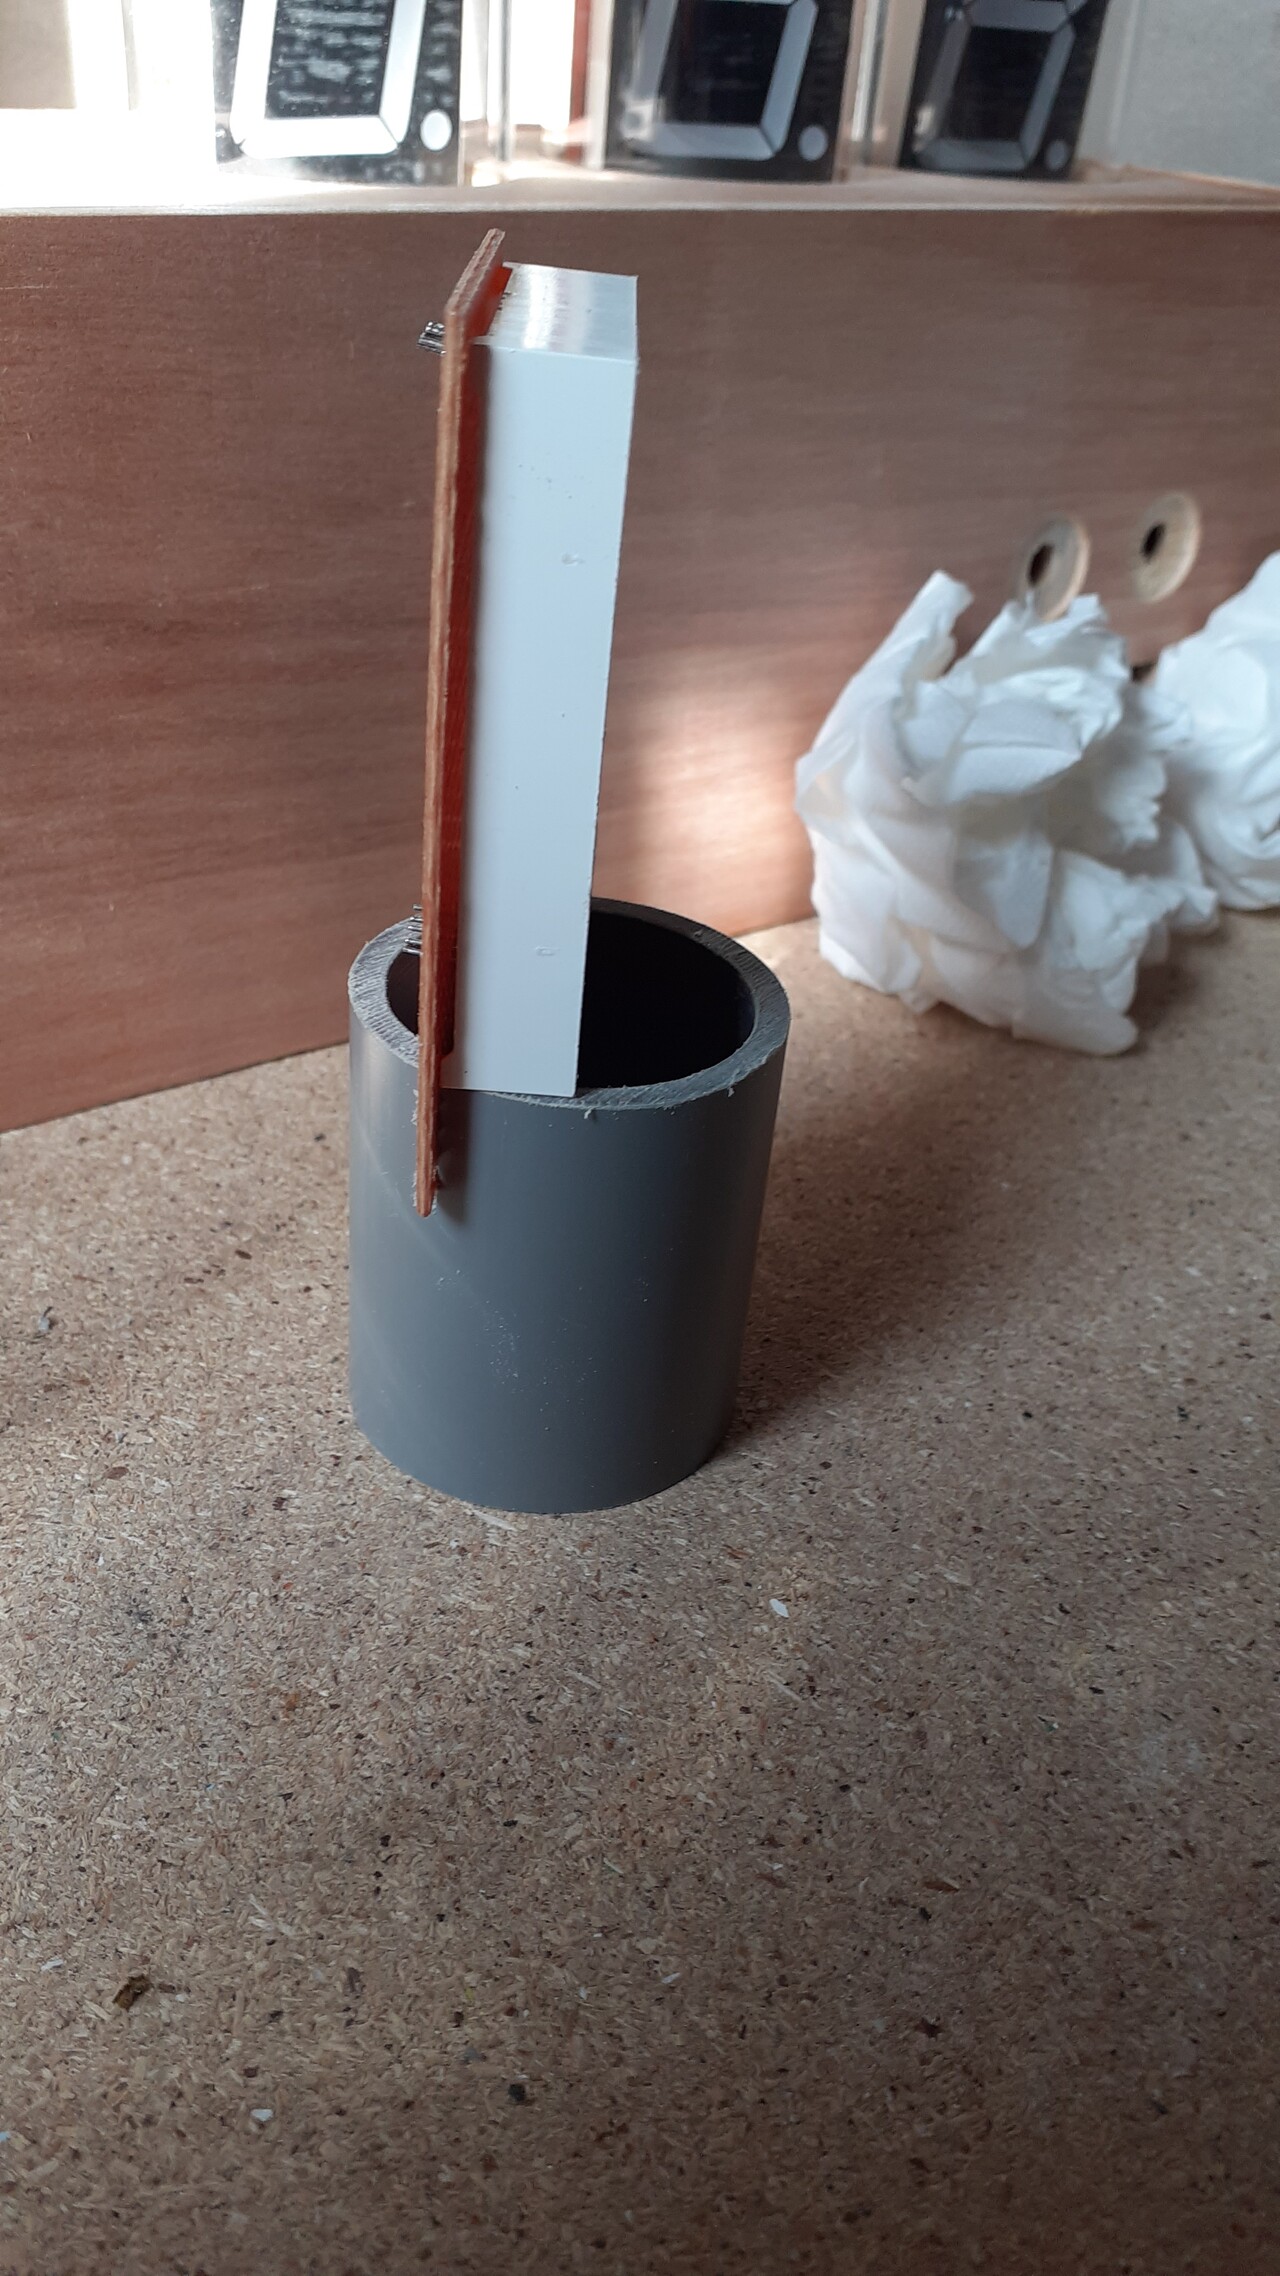
- Saw/grind slots in the PVC pipe in which you can stick the bottom part of the PCB of the 7-segment LEDs (see the next picture)
The Clockwork
In order to make the clock tick solder the following electronic parts (I don’t have a scheme available, will follow up)
- Solder the 7 segments to a PCB that sticks out underneath so it fits in PVC pipe (see previous picture)
- Add resistors to every single LED on the 7 segment display
- Take the wires to a board with the shift registers (see also https://www.arduino.cc/en/Tutorial/Foundations/ShiftOut)
- Solder the Arduino to a PCB (use fitting to make it easy to implement)
- Make sure to connect the shift registers to their own ports on the Arduino or daisy-chain them.
- Add the On/Off button and a power socket to power up the Arduino
- Connect the buttons for setting the clockwork to their ports on the Arduino.
- Connect the RTC to a port on the Arduino and to the power
Code
For the code, check out my Github. It needs a lot of work still. Right now the clock has the tendency to get ahead of time if it runs for longer periods.
https://github.com/MTheelen/Arduino-Cathode-Clock
Evaluation
- The code needs refactoring. It needs to be cleaner, also the clock gets ahead of time
- Have the LEDs blink when someone is setting the time.
- The casing shows the sides of the pinewood on top, which isn’t esthetically pleasing. More work, but nicer, would be to router/drill/chisel out a large beam.
- The LEDs are not so bright. It would be nice to control brightness automatically based on surrounding light (by means of a photoresistor) or manually with a potentiometer.